Click here for Toshiba Air Fryer Oven recipes! Microwave ovens do more than just heat, they also have the magic of cooking a variety of cuisines.
Toshiba air fryer toaster oven(ML2-EC10SA(BS) overview
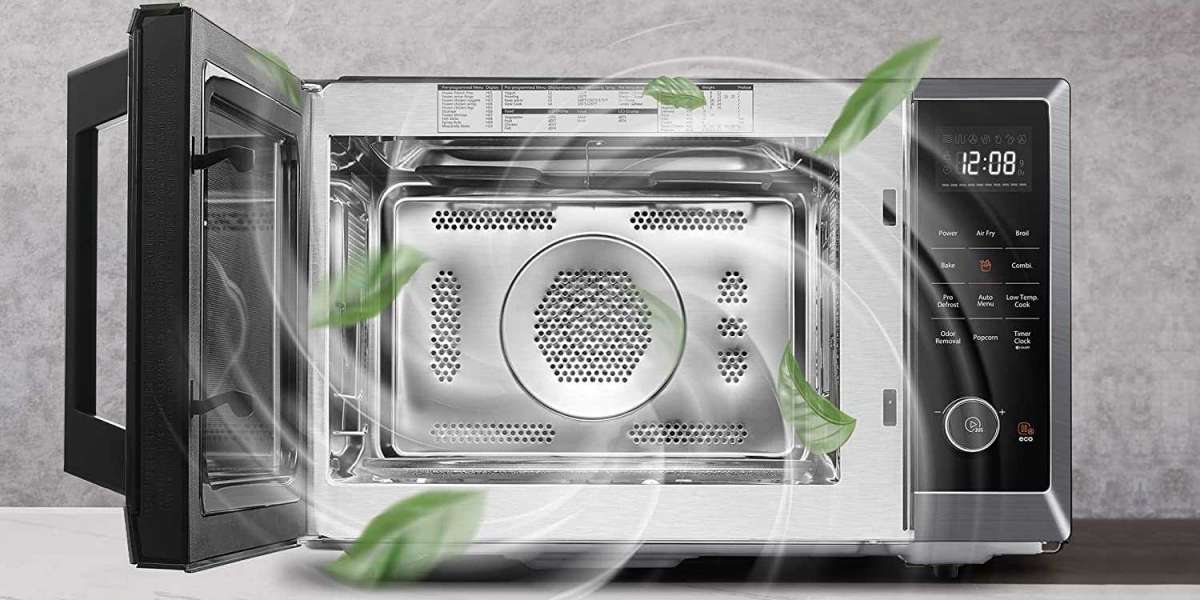
Excellent kitchen equipment is the key to successful cuisine, and here I am using this Toshiba ML2-EC10SA(BS) for my culinary experiments. This is an eight-in-one multi-function microwave oven. Unlike traditional single-function microwaves, it has various functions such as microwave, air frying, baking (convection), grilling, combination, low-temperature, odor removal, defrosting, and more, which can meet various needs in our daily lives. In addition, it is very user-friendly, even for beginners, with features like one-touch popcorn and quick cooking, allowing you to make delicious dishes without complex operations.
I really like its black stainless-steel appearance, which looks very high-end and complements my kitchen well. This Toshiba toaster oven also has a very suitable capacity. Although it looks compact, it has a large capacity and can easily accommodate a whole chicken. Next, I will share two Toshiba air fryer toaster oven recipes to help everyone use it better.
Toshiba air fryer toaster oven recipe share
1.Air fry grilled cheese
Ingredients:
2 slices of bread (your choice of bread)
2-4 slices of your favorite cheese (e.g., cheddar, American, Swiss, etc.)
2 tablespoons of softened butter
Instructions:
1. You have to preheat your air fryer to 380°F (193°C) for a while as you make ready with the sandwich.
2. Cut slices of bread and let the butter soft for spreading.
3. Add two to four pieces of cheese to a single slice of bread and put them together. Ensure that the cheese remains within the confines of the bread as the melt stage approaches. If you want more cheese for your sandwich, feel free to add some.
4. Put on another layer of bread over the two slices sandwiching the cheese.
5. After that, spread a thin layer of softened butter on the outside part of every bread slice. Evenly spread butter on the bread to obtain a crisp, golden-brown texture.
6. Put the sandwich into the air fryer basket. However, you might use a parchment paper liner or a cooking spray with low stickiness.
7. Cook the sandwich in the air fryer at 380°F (193°C) for about seven minutes. To prevent it from being overdone, check on the sandwich in between 5 and 6 minutes. If it’s golden brown and crispy on the outside, then the sandwich is ready.
8. Turn the sandwich over carefully with the aid of some tongs or spatula and air fry it again on each slide for about 2 to 3 minutes more for the other side to be equally golden and crispier.
9. After cooking the sandwich, remove it from the air fryer and allow it to rest for at least one or two minutes. Take care as its cheese will be sizzling hot.
10. Split the sandwich into two, and serve and savor the yummy, air-fried grilled cheese.
Feel free to customize your grilled cheese with your favorite bread and cheese varieties for a tasty twist on this classic comfort food.
2.Microwave brownies
Ingredients:
150g salted butter
150g caster sugar
1 tsp vanilla extract
2 tbsp milk
2 medium eggs, beaten
50g plain flour
75g unsweetened cocoa powder
80g milk chocolate chips
Instructions:
1. Chop butter into small chunks and put it in a 20×20 cm microwave-safe plate made of either glass or ceramic. Melt the butter by microwaving it into 20-second bursts. Take this out of the micro, stir it in the plate to cover the sides, then put it into a mixing bowl.
2. Place the melted butter into a bowl, and then add the castor sugar. Beat with your hand or an electric whisk until this mixture is creamy, and lumpy-free.
3. Mix the milk with the beaten eggs in one jug together with vanilla extract. Add this mixture a little bit at a time into the sugar and butter mixture making sure to mix well before incorporating some more.
4. Sieve together the flour and the cocoa powder that are un-sugared. After that, carefully incorporate the cake batter in this dry mixture. Lastly, fold in the milk chocolate pieces.
5. Pour the whole mixture into the greased plate and level it with the help of the spatula. Put it in the microwave cooker for approximately 5 minutes until the brownies rise nicely and feel slightly firm to the touch. If by chance, they are still a little soft inside out of micro then be assured that it will continue cooking for a couple more minutes.
6. Put the hot serving platter on the cooling rack and let it sit there for at least 20 minutes so that it will set. When done, let them cool down and then break them into eight square pieces. They can be put in an airtight container, remaining fresh for three days.
Enjoy your homemade microwave brownies!